


- Install VirtualBox
- Create a virtual machine for Windows 8
- How to install Windows 8 on a virtual machine?
Hello! I will write now a great article on installing Windows 8 on virtual machine VirtualBox. But not everything is so simple, the article will be detailed and of course with pictures and explanations. I have already compiled the approximate content and it looks like this:
- Install VirtualBox
- Creating a virtual machine in VirtualBox
I will write in detail where to download and how to install VirtualBox. Then we will create a virtual machine and install Windows 8 there. I already wrote an article about that, but I recently bought a laptop and installed Windows 7 on it, I’m not ready to work with figure eight yet.
But I still need to be able to log in to Windows 8, at least to write some instructions. So I thought about installing Windows 8 again with the second system, or installing it on a virtual machine. I actually chose the “virtual machine”, but it’s convenient to launch the program, launch Windows 8 and work for yourself, what else is needed.
A virtual machine is a program that emulates a normal computer. That is, it turns out that you will have a computer in the computer 🙂 in how. You can install different operating systems on a virtual machine, not just Windows 8. Now you will see for yourself.
Install VirtualBox
First we need to download and install the program. To do this, click on the link and download VirtualBox for Windows.
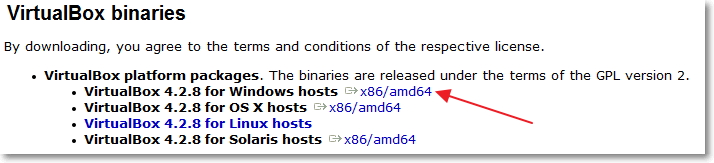
Save the installation file, and wait until it is fully downloaded to your computer. By the way, the size of the installation file is about 93 MB.
To begin installing the virtual VirtualBox machines , you need to run the installation file, just click on it twice with the left mouse button.
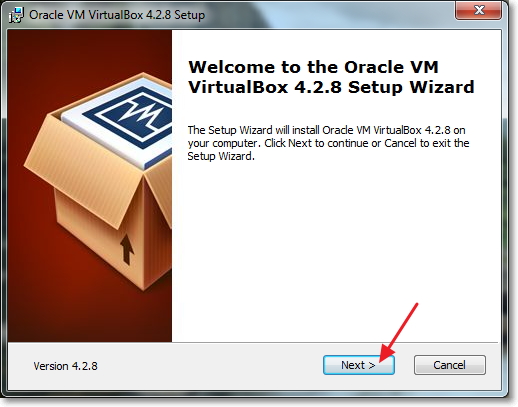
In the first window, just click “Next”.
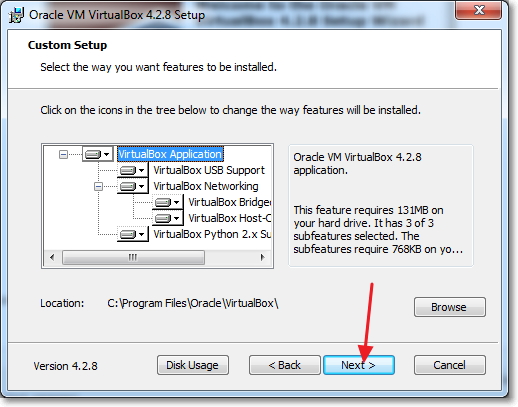
In the next window, I also advise you not to touch anything, but simply click “Next”.
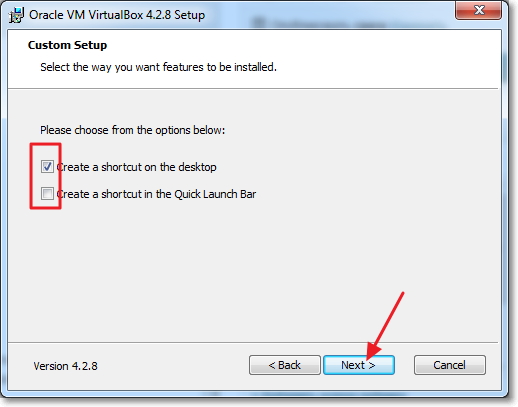
Then a window with two points will appear, I advise you to leave a tick next to the first one, in order to create a shortcut on the desktop to launch VirtualBox. But I advise you to remove the second one, there’s something about installing a bar, I think that we don’t need it. Click “Next” to continue.
During installation, these windows may appear:
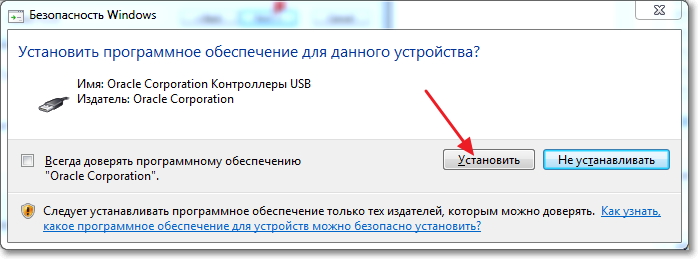
Answer these windows by clicking on the “Install” button. After the installation is complete, click “Finish”. All VirtualBox installed, you can now start creating a virtual machine.
Create a virtual machine for Windows 8
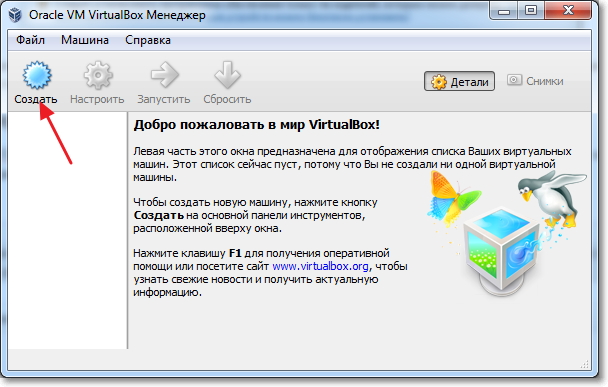
If the VirtualBox program does not start automatically, then launch it with a shortcut on the desktop. Well, let's get down to creating a virtual machine right away.
In the main window of the program, click the “Create” button.
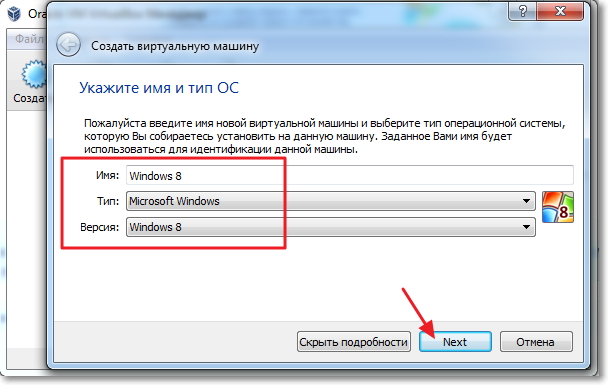
Set the name of our virtual machine, then specify the type and version of the operating system you want to install on it. I chose Windows 8. Click “Next” to continue.
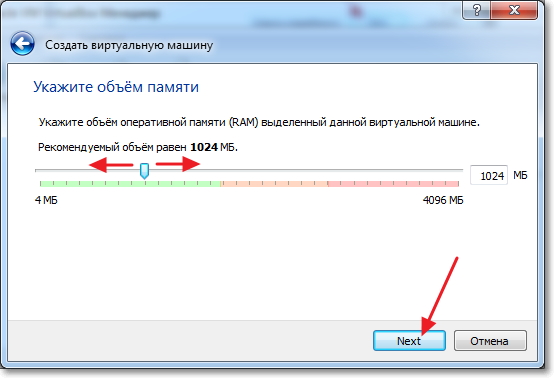
Next we need to set the size random access memory which can be used by the virtual machine. For Windows 8, at least 1 GB (1024 MB) is recommended, and install as many. If you have the opportunity, you can ask more, but do not overdo it.
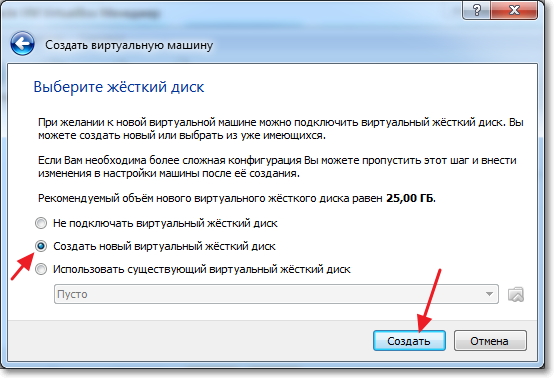
You need to create a virtual hard disk to install the Windows 8 operating system. Leave “Create a new virtual hard disk” selected and click “Create”.
Another window will open in which you need to select the type of the created one. virtual disk . Click the “Hide Details” button. Specify the place to save the virtual disk, for example, I chose the disk D. Then set the size for the virtual disk, I think that for Windows 8 20 GB will be enough, then leave everything as it is and click the “Create” button.

The virtual machine configuration window closes, which means that it is ready. You can start the installation of Windows 8.
How to install Windows 8 on a virtual machine?
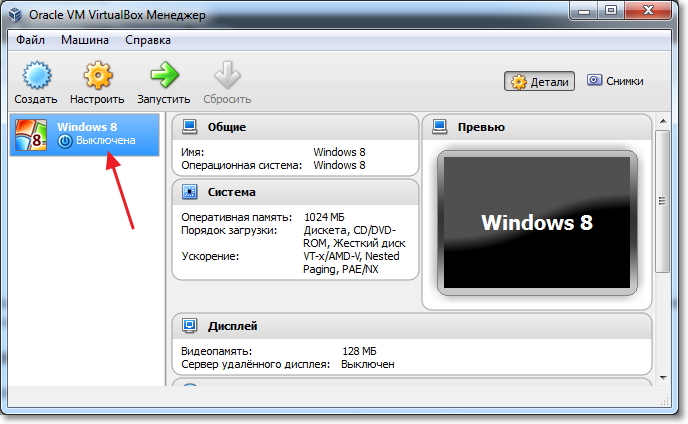
Back to the VirtualBox program, it should have remained open, if not, then start it.
We see that the virtual machine created by us appeared on the left. In order to run it, just click on it twice.
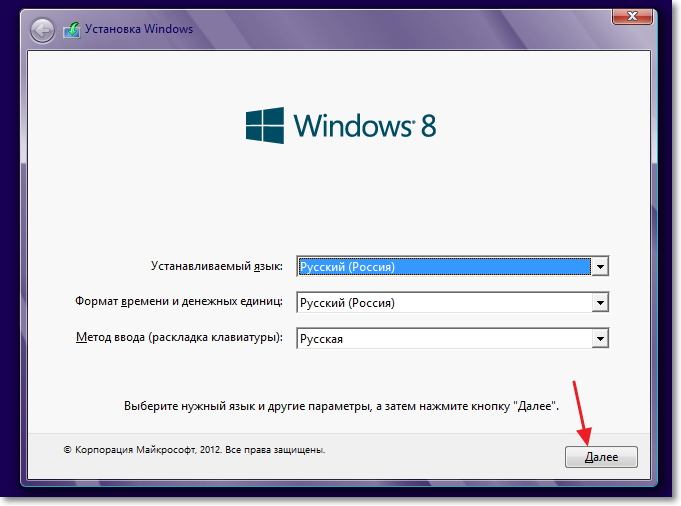
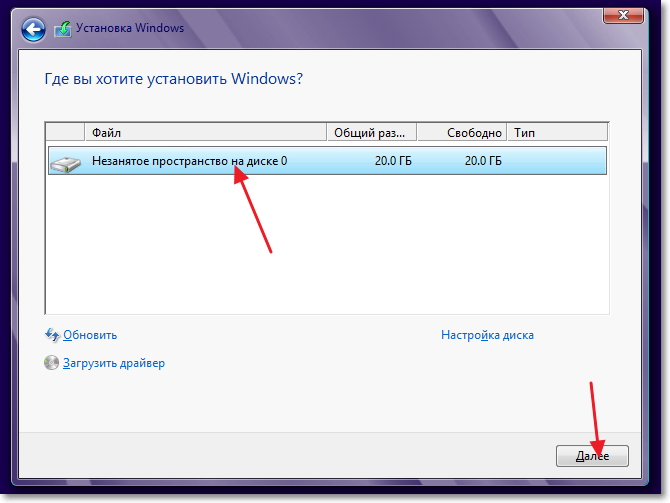
A new window will open, this is the virtual machine. On the alert, click “OK”. Now we need to specify where to install Windows 8. If you just have an .iso image with Windows 8 on your computer, then fine, we’ll just point the way to it and that's it. In my case, for example, Windows 8 is written to disk, then we insert the disk into the computer's drive and return to the virtual machine.
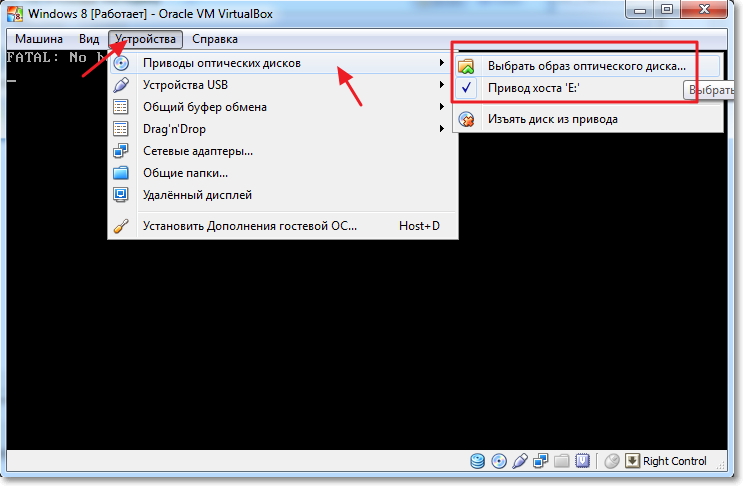
In order to tell the virtual machine where to boot from, click on the “Devices” in the top menu. Then “Optical Drive”, and if you have Windows 8 as an .iso file, select “Select an optical disk image” and specify the path to the .iso file. And if you are like me, you want to install Windows 8 on a virtual machine from normal DVD disc then enter “Host Drive [drive letter]”.
After the source for the download is selected, you need to restart the machine. To do this, click on the “Machine” tab and select “Restart”. If you did everything correctly, then after the reboot, the installation of Windows 8 will start.
We are waiting until the end of copying files for installing Windows 8.
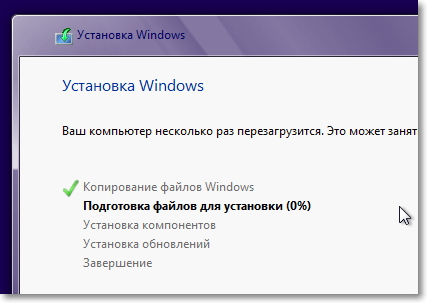
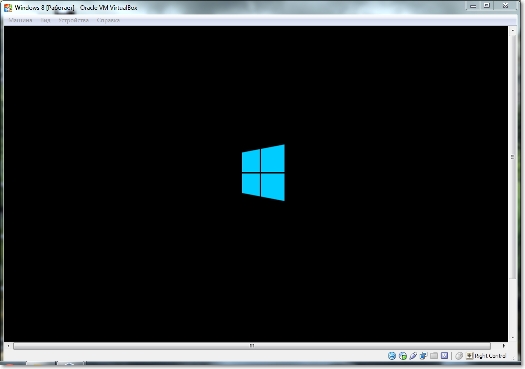
After copying files, a reboot will occur and continue. Windows installation 8 on VirtualBox.
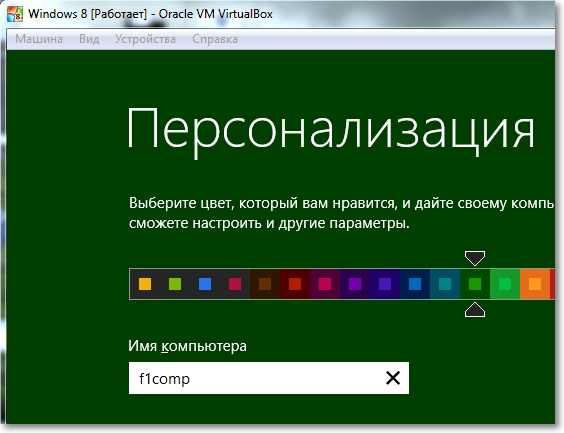
Select the color of the windows and set the name of the computer.
In the next window, click the button “Use standard settings”.
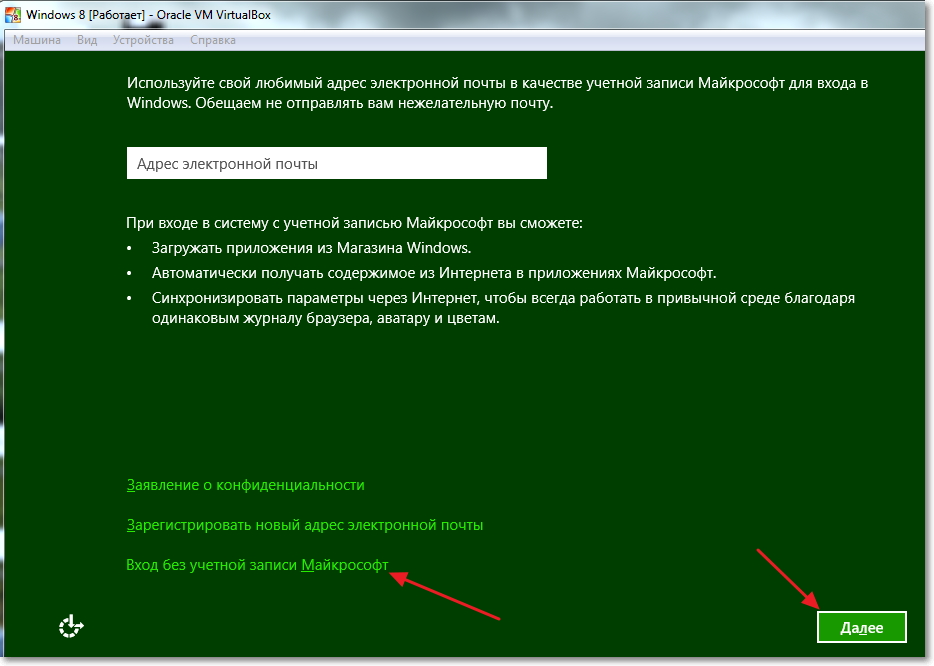
Click the button.
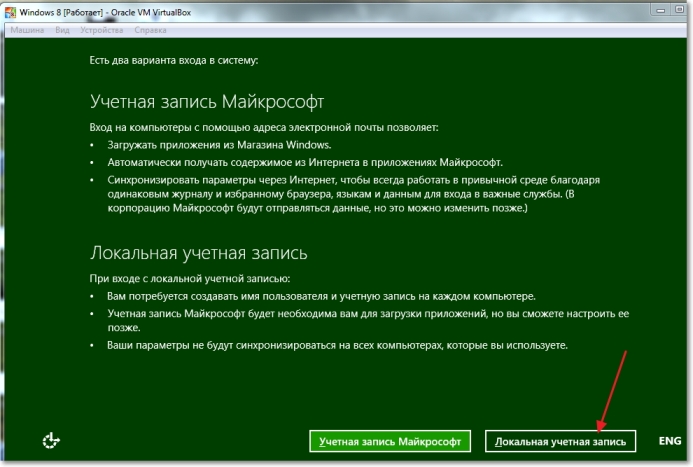
Enter your name and password if you want. Click “Finish”.

We are waiting until the installation system prepares the computer, the desktop should appear.
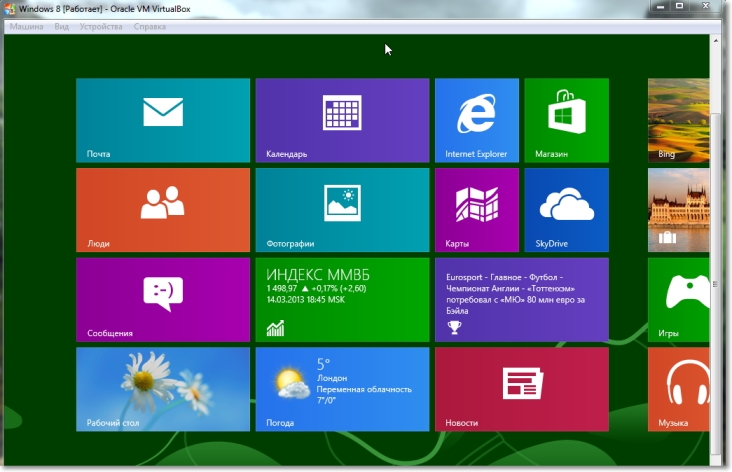
All is ready! Installing Windows 8 on a virtual machine is over, applause :).
If you want to close the virtual machine, then simply click on the red cross and “OK”. In order to restart Windows 8, open VirtualBox and start our virtual machine.
Watched: 25979
0
Run the Oracle VM VirtualBox application (a shortcut is created on the desktop when you install the platform, which you can use). A window will open before us, and in it (which is very nice) everything will be in Russian. To create your first virtual machine, click the Create button. A new window will open before you, in which there will be a message about the launch of the virtual machine creation wizard:
Click the Next button and see a new window offering to choose the name of the operating system, its family and version. The pic is my choice, but you can choose any of available systems to your liking.
After clicking the Next button, you will be asked to determine the size of the RAM allocated to the virtual machine. I choose 2048mb, but for stable work with virtual windows system 7 will be enough and 512mb.
Next, you need to create a virtual hard disk. If you have already created virtual disks, you can use them, but we will consider the process of creating a new disk. Confirm that the hard disk we are creating is bootable, check the box “Create a new hard disk” and click the “Next” button.
In the new window, you will be asked to select the type of disk being created - “dynamically expanding image” or “image fixed size ". The difference is explained in the help of this window:
In the next window, you will need to select the location of the virtual hard disk being created and its size. For a bootable hard disk with a Windows 7 system, the default size (25 GB) is sufficient, but it is better to place it outside your system partition, since you should not overload your real boot disk and create files of this size on it:
After that a “Total” window will appear, in which the type, location and size of the hard disk you are creating will be indicated. If you agree to create a disk with these parameters, click Create:
Upon completion of the creation of the hard disk, a new “Total” window will appear, in which the parameters of the virtual machine you are creating will be specified. If you have not changed your mind on any of the points described, click “Create” and proceed to setting up the hardware of your virtual machine:
On the first tab of the “General” section, we see the main parameters of our virtual machine.
Let's go to the tab in addition and see what system settings we can make:
"Folder for pictures." If you have placed your hard in its own location, then it is better to transfer this folder there too, since pictures are heavy and, again, you shouldn’t overload your system disk . My recommendation is to take snapshots before every major change you want to make in virtual system and even on one virtual machine, you can create several snapshots containing different settings and installed applications;
“Shared Clipboard” is the definition of how the clipboard will work between your host system and the virtual machine. There are four options for operation of the buffer - “off”, “only from guest OS to main”, “only from main OS to guest”, “bidirectional”. We will choose the last option, because this will provide us with maximum convenience in work;
“Removable media to remember changes in the process of work”, here we put a flag in token of agreement, because This option will allow the system to remember the state of CD \ DVD drives;
The Mini Toolbar is a small console containing virtual machine controls. It is best applied only in full screen mode because it is completely duplicated by the main menu of the working window of the virtual machine. It’s really better to have it on top simply because you can accidentally click on any control, trying, for example, to maximize a window from the taskbar of a virtual machine.
Go to the system section and on the first tab, the motherboard will make the following settings:
if necessary, we will correct the size of the RAM of your virtual machine, although you will finally be convinced of the correctness of the chosen volume only after starting the virtual machine. You can choose the size based on the amount of available physical memory installed on your PC. For example, in the presence of 4 GB of RAM, the allocation of 1 GB is optimal, i.e. one fourth part, which will allow your virtual machine to work without the slightest hang;
let's correct the boot order - the floppy disk drive (“floppy) can be turned off altogether, and be sure to put the CD / DVD-ROM first so that you can install the OS from the boot disk. In this case, both a compact disc and an ISO image can act as a boot disk;
all other settings are described in the dynamic help from below, and their use depends on the hardware of your real PC, and if you set the settings that are not applicable to your PC, the virtual machine system simply does not start.
Go to the tab "Processor", here you can choose the number of processors installed on your virtual motherboard . Please note that this option will be available only if AMD-V or VT-x hardware virtualization is supported, and the OI APIC option is enabled in the previous tab.
Here I will again turn your attention to AMD-V or VT-x hardware visualization settings. Before enabling these settings, you need to find out if these features are supported by your processor and whether they are enabled by default in the BIOS (they are often disabled).
Go to the section "Display". In this section, on the Video tab, you can set the size of the memory of a virtual video card, as well as enable 2D and 3D acceleration, with the inclusion of 2D acceleration being desirable, and 3D optional. On the “Remote Display” tab, you can enable the option where your virtual machine will act as a Remote Desktop Server (RDP).
Go to the media section. Here you can see the virtual hard disk created earlier and the position labeled empty. Select this position and perform the setting.
There are two ways to set up a virtual CD-ROM drive:
the first option is to select your real or virtual CD / DVD-ROM (existing in the real system) in the “Drive” drop-down menu and load the physical disk with Windows distribution 7 or an ISO image if it is an emulator;
the second option is to click the icon on the right, in the pop-up menu, click "select an optical disk image" and in the open window add the ISO image of the Windows 7 boot disk, this way we will go.
Setting up the network and network interaction is not considered in this article, so I’ll just note that network adapter NAT is enabled by default, and this is enough to provide your virtual machine with Internet access.
I do not describe the COM section in detail, because there is nothing to connect to ports of this type. If you still need to connect a device with an RS-232C interface, the most convenient way is to enable the virtual machine's COM port in the “host device” mode, and use the name of the actual port of your PC that you will use as the “path to the port” You can look in the device manager.
Go to the USB section, here we put both checkboxes available.
Go to the section "Public Folders" and select the folders that you want to make available for the virtual machine.
This completes the configuration of the hardware of your virtual machine, and you can proceed to the installation of the operating system
Go back to the main VirtualBox window and click the "Start" button.
This window is most likely familiar to you (if you have at least once installed the Windows operating system on your own), and the installation process is no different from installing the OS on your real computer:
I will not describe the installation process, I will show only screenshots:
After the system is installed and loaded, you can proceed to setting up the operating system of your virtual machine.
First we need to install drivers for all virtual hardware components of our virtual PC. To do this, in the main menu, select the item "Devices" and click "Install add-on guest OS ..."
The autorun window opens, click "Run":
In the last window of the installation process, you will be prompted to restart the virtual machine - agree, after rebooting, you will see that the image has become clearer, the virtual machine window size changes dynamically, the mouse integration function is enabled and there is Internet access.
VirtualBox is a virtual machine with the ability to run operating systems other than the one installed on the computer. This is usually required to test the OS, obtain information about the systems and their features. By installing any OS on VirtualBox, you can perform tasks that are not feasible on the main OS. Windows XP can be installed on VirtualBox, as well as another OS: Linux, Ubuntu, Mac OS X and even Android.
VirtualBox is not a very complicated program. If you strictly follow the instructions, then you will succeed
The guest system, delivered via VirtualBox within the framework of the existing one, will help to accomplish, for example, the following tasks:
- run software products incompatible with the primary OS;
- use old applications;
- run old games that do not function in new versions of the operating system;
- test applications potentially dangerous.
To create a virtual machine, download VirtualBox from the official site. Installing the program is no different from installing any other. If the system suddenly warns you that the software has not been tested with this version of the operating system, ignore it. This warning comes out several times, continue the installation.
The VirtualBox interface when installing different operating systems has small differences, but they are not so significant. The principle of creating a guest OS remains the same for both Windows versions and, for example, Ubuntu.
Having installed the program, we create the machine. To do this, follow the algorithm:
- Activate the "Create" button.
- In the window that opens, select the OS, its type and version, give your virtual machine a name. This name does not affect anything, just reflected in the title of the window.
- Determine the available amount of RAM. To run the OS, such a default memory is sufficient. To run the OS itself, it is quite enough, but it may not be enough to activate the programs. Therefore, if your HDD allows, put at least 512 MB, and better all 1024.
- Next you will be asked to choose a hard disk for the guest system: use the existing one or create a new one. Create a new one.
- The next parameter that you are asked to include is the type of file that determines the format of the new disk being used. Leave the VDI.
- AT optional attributes You can choose a dynamic or fixed disk. Fixed works faster, but immediately takes all the allocated space on the hard drive. Dynamic captures on the hard drive space needed for the guest system, applications, will automatically expand with additions, installing programs. It is recommended to choose a fixed option for speed.
- Specify the name of the new hard virtual disk, specify the location of the file folder, set its size - the size of the files stored on this disk. For example, for Windiws XP, according to the manufacturers, 10 GB is enough; for Linux, you can leave the allocated amount by default.
- Complete the process by clicking on the "Create" button.
The creation process takes about 7 minutes. The computer this time do not bother, the central processor is involved. After creating the machine, adjust the settings by clicking the "Customize" tab. However, the default settings are enough to run the OS, the functioning of the guest system.
[ U ] [ OT ] [ ST ] [ OST ] [ TG ] [ GTU ]
![]()
id
Other Russian
Ukrainian
Belorussian
Polish
English
Spanish
![]() Deutsch
Deutsch Turkish
Bulgarian
Czech
Hungarian
Estonian
Armenian
Kazakh
Hebrew
Georgian
Serbian
Croatian
Lithuanian
Slovak
Slovenian
Albanian
Macedonian
Latvian
Kyrgyz
Mongolian
Portuguese
Uzbek
Korean
Romanian
Danish
Greek
Dutch
Norwegian
Swedish
Italian
French
indonesian id arabic
Hindi
Bengal
Chinese
[Azerbaijani
] [bosnian bs ] [tajik
] [Latin
] [Vietnamese
] [Kannada kn ] [Finnish
] [Filipino
] [Irish
] [Icelandic
] [Scottish (Gaelic) gd ] [Japanese
] [Afrikaans
] [Amharic am ] [Catalan
] [ Cebuan ceb ] [Corsican
] [Welsh
] [Esperanto
] [Basque eu ] [Persian
] [Frisian
] [Galician
] [gujarati gu ] [house
![]() ] [Hawaiian
] [Hawaiian ] [Hmong hmn ] [Creole (Haiti) ht ] [Igbo ig ] [Javanese
] [Khmer
] [Kurmanji
] [Luxembourg lb ] [Lao
] [Malagasy
] [Maori
] [Malayalam ml ] [Marathi mr ] [Malay
] [Maltese
] [Burmese my ] [Nepali
] [cheva ny ] [punjabi
![]() ] [Pashto
] [Pashto ] [sindhi sd ] [Sinhala si ] [Samoan
] [shona sn ] [somali
] [sesoto st ] [Sudanese
] [Swahili
] [Tamil
] [Telugu te ] [Thai
] [urdu
] [khosa xh ] [yiddish yi ] [yoruba yo ] [zulu
] [ Tf ]
Notice : Undefined variable: url_text in /home/admin/web/server4.doubleclick.net.ru/public_html/scripts/api/method/TranslateText.php on line 936
No text
Container is damaged! Try to get the article again GetTextFromUrl.php , but this will delete all existing translations !!!